A damp patch around a chimney breast after rain usually means water is entering through the chimney stack, the surrounding roof covering or the junction between the two. However, the closest visible defect is not always the real cause.
Rainwater can enter higher up the stack, pass behind lead flashing, soak into damaged brickwork or travel along roofing underlay before appearing inside. The resulting mark may develop on the chimney breast, the adjoining ceiling or a wall several metres from the original opening.
The timing matters. Damp that appears or worsens after rainfall is more likely to involve external water penetration, while staining that changes during dry but humid weather may be linked to condensation or salts remaining from an older chimney problem.
At Collective Roofing Services, we inspect the chimney and the surrounding roof as one connected system. This helps us identify where the water is entering before recommending repairs, rather than covering the internal stain and hoping the problem disappears.
Why Chimney Breasts Are Vulnerable to Rainwater
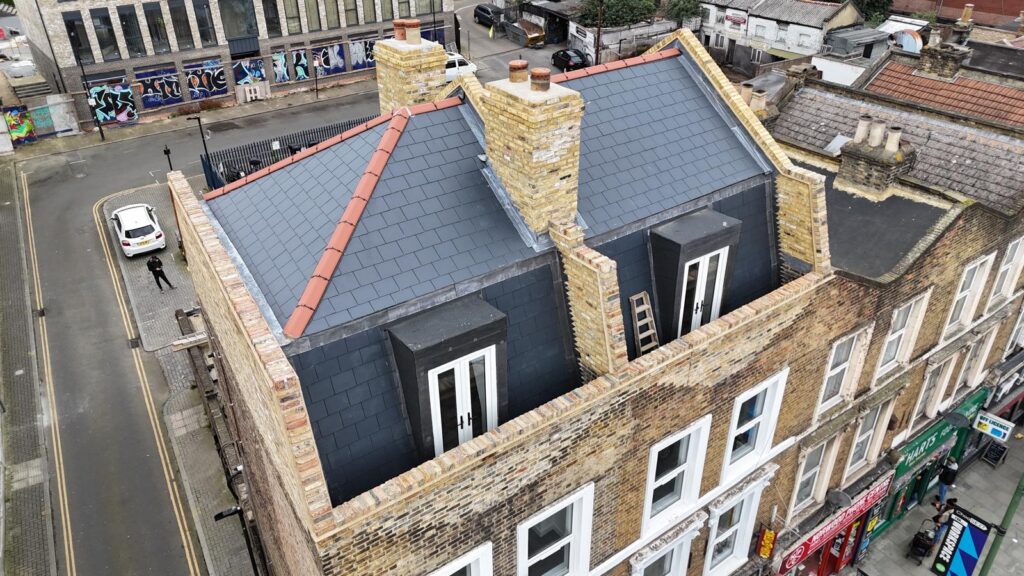
A chimney passes directly through the roof covering and remains exposed above the roofline. The stack must withstand wind, rain, frost and repeated temperature changes while maintaining a watertight connection with the tiles or slates around it.
Several materials meet in a relatively small area:
- Brickwork
- Mortar joints
- Lead flashing
- Roof tiles or slates
- Roofing underlay
- Chimney pots
- Flaunching
- Internal plaster
Movement or deterioration in any one of these components can provide a route for water.
Traditional chimneys may also contain several flues, including some that are no longer used. This can make diagnosis more complicated because the moisture may be caused by external rain penetration, condensation inside a disused flue or a combination of both.
SPAB guidance explains that damp patches on old chimney breasts are commonly associated with either defects in the stack and adjoining roof that allow rainwater into the masonry or condensation within disused flues.
Failed Lead Flashing Around the Chimney
Lead flashing creates the weatherproof junction between the chimney stack and the roof covering. It directs water away from the point where the masonry passes through the tiles or slates.
A typical chimney detail may include:
- Step flashing along the sides
- An apron at the lower edge
- Soakers beneath the surrounding tiles or slates
- A lead back gutter behind the chimney
When one section lifts, cracks, splits or pulls out of the mortar joint, rain can pass behind it. The water may then run down the side of the chimney or enter the roof space before reaching the internal plaster.
Flashing problems may develop because of age, poor installation, building movement, damaged mortar or previous repairs using unsuitable sealants. SPAB recommends repairing or replacing split and holed flashings and notes that lead back gutters behind chimney stacks can leak when they become obstructed.
Collective Roofing Services repairs and replaces chimney flashing, including stepped details, mortar joints, wall abutments and other vulnerable roof junctions.
Cracked or Missing Chimney Pointing
Pointing is the visible mortar between the bricks. It protects the joints from weather while helping the chimney stack remain stable.
Mortar gradually deteriorates through exposure to rain, frost and temperature changes. Small cracks may initially absorb only a limited amount of moisture, but prolonged rain can saturate the joints and surrounding bricks.
Possible warning signs include:
- Mortar falling onto the roof
- Deep or open joints
- Cracks running through the pointing
- Plants growing from the stack
- Damp concentrated on one side of the chimney breast
- White salt deposits on internal plaster
- Loose or unstable bricks
A chimney may look reasonably sound from ground level while the upper or less visible faces are badly weathered. The side facing the prevailing weather often deteriorates first.
Repointing removes loose or failed mortar and replaces it with a suitable new mix. On older and listed buildings, the replacement material must be compatible with the original masonry. Historic England advises that chimneys should be kept in good repair and recognises repointing and re-flaunching in matching materials as normal maintenance in appropriate cases.
Damaged Flaunching Around the Chimney Pots
Flaunching is the sloping mortar bed around the base of the chimney pots. Its purpose is to secure the pots and direct rainwater away from the top of the stack.
Over time, flaunching can:
- Crack
- Separate from the chimney pot
- Lose its slope
- Become loose or crumbly
- Develop gaps around the edges
- Hold water instead of shedding it
Rain entering through these cracks can soak into the stack from above. Because the moisture starts at the top, it may take time to travel through the masonry and become visible inside.
A damp mark caused by damaged flaunching may therefore appear several hours after the rain begins and remain visible long after the weather clears.
The appropriate repair may involve removing the defective material, checking the stability of the pots and renewing the flaunching with a properly formed slope.
Rain Entering Through an Unprotected Chimney Pot
An open chimney pot allows some rain to enter directly into the flue. A functioning chimney should be designed to tolerate normal exposure, but heavy or wind-driven rain can create problems where a flue is unused, poorly ventilated or already affected by defects.
A suitable cowl or rain cap may reduce direct entry while maintaining the ventilation or airflow the chimney requires. The correct type depends on whether the flue is active, redundant, lined or connected to an appliance.
A chimney pot should not simply be sealed without considering ventilation. Completely blocking a disused flue can trap moisture and increase condensation within the chimney breast.
Where rain appears to be entering through the pot, an inspection should also check the flaunching, masonry and flashing. Installing a cowl will not repair a separate defect lower down the stack.
Porous, Cracked or Spalling Chimney Bricks
Chimney bricks are exposed on every side and can absorb rain when their protective face or surrounding mortar deteriorates.
Repeated wetting and freezing can cause the face of a brick to break away. This is known as spalling. Once the surface has deteriorated, the brick may absorb water more readily and continue to weaken.
Common signs include:
- Flaking brick faces
- Crumbling corners
- Pieces of masonry on the roof
- Dark, saturated patches after rain
- Cracks through individual bricks
- Bulging or uneven sections of the stack
Applying a coating over damaged masonry without addressing the cause may trap moisture or conceal further deterioration. Severely damaged bricks may need to be carefully removed and replaced, while localised mortar defects may be resolved through repointing.
If the chimney has been rendered, cracks in the render can also admit water. Moisture may spread behind the coating before appearing internally, making the source difficult to identify from the ground.
Problems With the Chimney Back Gutter
The back gutter sits on the uphill side of the chimney, where rainwater running down the roof must be diverted around the stack.
This area can receive a considerable amount of water during heavy rain. Leaves, moss, broken mortar and other debris may obstruct the channel, causing water to collect behind the chimney.
The back gutter may also leak when:
- The lead has split
- Joints have failed
- The fall is inadequate
- The detail is too small for the amount of water
- Tiles have moved around the edges
- Previous repairs have restricted drainage
A blocked or damaged back gutter can allow water beneath the roof covering, where it may travel along the underlay or roof timbers.
Because this section is hidden behind the chimney when viewed from ground level, it is often missed during a basic visual check. SPAB specifically identifies uncleared lead back gutters as a potential source of chimney leakage.
Cracked Tiles or Slates Beside the Chimney
The chimney itself may be in good condition while the roof covering around it has failed.
Tiles and slates are frequently cut to fit around chimney stacks. These smaller sections can move, crack or become loose, especially if they were not properly fixed during an earlier repair.
Water may pass through:
- A cracked tile
- A slipped slate
- A missing section of roof covering
- A gap beside a lead soaker
- Damaged underlay
- An old fixing hole
- Poorly completed previous work
The internal damp may still appear directly on the chimney breast because the masonry or nearby timber provides the easiest path for the water to follow.
Collective Roofing Services investigates roof leaks caused by damaged coverings, failed flashing, chimney defects, valleys and other vulnerable details. The visible internal patch is not always directly below the external fault, so the wider area must be checked before the repair is agreed.
Damaged Roofing Underlay
Tiles and slates provide the main protection from rain, while the underlay beneath them offers an additional line of defence.
If water passes through the outer covering, correctly installed underlay should help direct it towards the eaves. Problems arise when it is:
- Torn
- Brittle with age
- Sagging
- Poorly joined
- Cut incorrectly around the chimney
- Damaged by previous work
- Worn around nails or battens
Water can travel along the underlay before dripping into the roof space. This means the damp patch may appear away from the damaged tile or flashing.
Renewing a small section of underlay may require surrounding tiles or slates to be lifted so the material can be properly lapped and integrated with the rest of the roof.
Could the Damp Be Condensation?
Although the connection with rainfall may appear clear, not every damp chimney breast is caused by water entering from outside.
Warm, moisture-laden air can enter a cold or unused chimney flue and condense against the internal surfaces. The resulting moisture is absorbed by the masonry and may become visible through the plaster.
Condensation is more likely where:
- The fireplace has been sealed
- The flue is no longer used
- Ventilation has been removed
- The chimney is particularly cold
- The room has high humidity
- An unsuitable liner has been fitted
- The damp changes during cold or humid weather
SPAB notes that brown staining on old chimney breasts can be caused by condensation inside disused or rarely used flues. Moisture can carry soot and tar deposits into the surrounding masonry, creating stains through the plaster. Ventilation may help reduce this problem once external defects have been ruled out.
A roof inspection remains useful because an unused flue can suffer from condensation and rain penetration at the same time.
Hygroscopic Salts Can Make Old Damp Reappear
A chimney breast may continue to look damp after the original leak has been repaired.
Combustion deposits and long-term water penetration can leave salts within the masonry and plaster. Some of these salts are hygroscopic, meaning they absorb moisture from the surrounding air.
The patch may darken during humid weather and fade when the room becomes drier, even when no new rain is entering.
SPAB explains that hygroscopic salts can remain in chimney flues long after they are no longer used and may continue to cause dampness on surrounding plasterwork.
This is why the correct order of work is important:
- Find and repair the external defect.
- Allow the chimney breast to dry.
- Reassess the internal plaster.
- Replace contaminated finishes where necessary.
- Redecorate only when the area is ready.
Painting over the stain before the source has been confirmed may temporarily hide it, but the mark is likely to return.
What the Location of the Damp Can Tell You
The position and behaviour of the staining can provide clues, although they cannot confirm the cause on their own.
| Damp Pattern | Possible Cause |
|---|---|
| Staining at ceiling level beside the chimney | Flashing, tiles, back gutter or roof underlay |
| Damp near the top of the chimney breast | Stack masonry, flaunching or upper flashing |
| Brown staining on an unused fireplace breast | Condensation carrying soot or tar deposits |
| Damp on the windward side after storms | Cracked pointing or porous masonry |
| Water appears quickly during rain | Direct flashing, tile or roof-junction defect |
| Mark develops after prolonged rainfall | Saturated masonry or a slow-tracking leak |
| Stain changes during humid but dry weather | Hygroscopic salts or condensation |
| Water runs down inside the fireplace | Pot, cowl, flaunching or flue-entry problem |
Water can travel along rafters, underlay and masonry, so the stain should be treated as evidence rather than an exact map of the defect.
Checks You Can Make From Inside
Homeowners can gather useful information without climbing onto the roof.
During or shortly after rainfall, check:
- When the damp first appears
- Whether it grows during prolonged rain
- Which side of the chimney breast is affected
- Whether the stain reaches the ceiling
- Whether water is visible inside the fireplace
- Whether the flue is active or disused
- Whether the patch smells sooty or musty
- Whether plaster is soft, blistered or crumbling
Where the loft is safely accessible, look for damp timbers, wet insulation, staining on the chimney masonry or water tracks on the underlay.
Only walk on properly boarded areas or visible structural timbers. Do not step onto insulation or the plasterboard ceiling beneath it.
Do Not Climb Onto the Roof Yourself
Chimneys are usually positioned close to the ridge or another exposed section of the roof. Reaching them safely may require scaffolding, roof ladders, edge protection or another planned access method.
The Health and Safety Executive states that sloping-roof work requires measures to prevent falls and that even short-duration tasks need appropriate, secured access equipment.
Looking from the ground with binoculars or a zoom camera may reveal missing tiles, obvious cracks or loose masonry. However, it will not show concealed soakers, the condition of the back gutter or small defects behind the stack.
A close professional inspection is safer and more likely to identify the correct cause.
Why Sealant Is Rarely a Complete Repair
Applying roof sealant around the chimney can appear to be a quick solution, particularly when the exact entry point is unclear.
However, sealant may fail when applied to:
- Wet surfaces
- Loose mortar
- Dirty lead
- Moving joints
- Cracked masonry
- Previously coated materials
It may also divert water into another part of the roof or conceal a defect that continues to deteriorate.
A lasting repair should restore the correct chimney detail. This may mean renewing the flashing, replacing damaged masonry, repointing the stack or rebuilding the flaunching rather than covering everything with surface sealant.
How We Inspect Damp Around a Chimney
A thorough inspection considers both the chimney and the surrounding roof.
Depending on the property and the symptoms, we may check:
- Lead flashing and soakers
- The chimney back gutter
- Mortar pointing
- Bricks and render
- Flaunching
- Chimney pots and cowls
- Tiles or slates around the stack
- Roofing underlay
- Roof valleys and nearby junctions
- The loft and visible water tracks
- Gutters and drainage around lower roof sections
- Previous repair work
We also consider when the damp appears and whether the internal pattern suggests condensation or salts rather than an active rainwater leak.
Buildings should be protected against precipitation, wind-driven rain and harmful condensation. Approved Document C includes moisture-resistance provisions for roofs and walls, reflecting the importance of distinguishing between these different sources.
Repairs That May Be Recommended
The correct repair depends entirely on the inspection findings.
Possible work includes:
- Replacing or refixing lead flashing
- Renewing step flashing and soakers
- Repairing the chimney back gutter
- Repointing deteriorated mortar joints
- Replacing damaged bricks
- Renewing cracked render
- Rebuilding the flaunching
- Re-bedding loose chimney pots
- Installing a suitable cowl
- Replacing broken tiles or slates
- Repairing damaged roofing underlay
- Improving ventilation to a redundant flue
Some chimneys need only a targeted repair. Others may have several defects caused by age or years of postponed maintenance.
Collective Roofing Services can repair or rebuild damaged stacks, repoint mortar joints and replace lead flashing to prevent continued leaks and damp.
When Chimney-Breast Damp Needs Urgent Attention
Arrange an inspection promptly when you notice:
- Water flowing into the room
- Rapidly spreading ceiling stains
- Damp around electrical fittings
- A sagging or bulging ceiling
- Loose bricks or mortar falling from the stack
- A visibly leaning chimney
- Large cracks through the masonry
- Damp roof timbers
- Repeated leakage after previous repairs
- A strong persistent smell of damp or soot
Structural movement and falling masonry require urgent professional assessment. Water near lights, cables or sockets should also be treated cautiously.
Even a small patch should not be ignored when it returns after every period of rain. Repeated wetting can damage plaster, decorations, insulation and surrounding timber while making the eventual repair more extensive.
Book a Chimney and Roof Inspection
Damp around a chimney breast after rain is a warning that water may be entering through the stack or the roof details around it. The sooner the cause is identified, the easier it is to limit internal damage and prevent the defect from spreading.
Collective Roofing Services can inspect your chimney, flashing, tiles, mortar, flaunching and surrounding roof area to trace the likely source of the moisture. We will explain what we find and recommend the repair needed to restore a reliable, weatherproof finish.
Rather than repeatedly painting over the stain or relying on temporary sealants, arrange a professional roof inspection and deal with the point where the water is entering.